Set up a basic NPM-based project
In this tutorial you will set up a simple NPM project that runs an HTTP server using Express.js
In this tutorial, we’ll set up a basic project that uses BrowserPod to run a web server application entirely in the browser, with no backend infrastructure.
1. Get the code
You can get the source by running npm create browserpod-quickstart@latest and
selecting the “Web Server” template.
Project structure
The project consists of the following files and directories:
├── .env├── index.html├── package.json├── public│ ├── favicon.png│ ├── logo.png│ └── project│ ├── main.js│ └── package.json├── src│ ├── main.js│ ├── style.css│ └── utils.js└── vite.config.jsThere are two different NPM projects at play:
- The top level project, which is a Vite project serving a web page with BrowserPod running in it.
- The inner project, in the
public/projectdirectory, which is the web application that we want to run inside BrowserPod itself. It’s a simple Hello World express.js application.
2. Get familiar with the project files
Let’s go through the relevant files one by one, explaining their purpose!
Project’s package.json
Let’s start from the inner project. This is the NPM project that we want to run inside BrowserPod.
Its package.json is very simple:
{ "name": "expressjs-tutorial", "version": "1.0.0", "description": "", "main": "main.js", "scripts": {}, "author": "", "license": "MIT", "dependencies": { "express": "^5.1.0" }}The only dependency is express.js, a popular web framework.
Project’s main.js
This is the main code of the project. A simple hello world web server (actual content of the html omitted for brevity):
const express = require("express");const app = express();const port = 3000;
app.get("/", (req, res) => {  res.send(`    <!DOCTYPE html>    <html lang="en">    ...    </html>  `);});
app.listen(port, () => {  console.log(`Example app listening on port ${port}`);});
Top level package.json
The top level package.json is also very minimal. The only dependencies are Vite (used to bundle the code and run a development server), and BrowserPod:
{ "name": "bp-tutorial", "version": "0.0.0", "type": "module", "scripts": { "dev": "vite", "build": "vite build", "preview": "vite preview" }, "devDependencies": { "vite": "^7.2.4" }, "dependencies": { "@leaningtech/browserpod": "latest" }}vite.config.js
This file contains the Vite configuration. See https://vitejs.dev/config![]() for all possible options. We are only interested in setting up COEP
for all possible options. We are only interested in setting up COEP![]() and COOP
and COOP![]() headers,
which are necessary for BrowserPod to function.
headers,
which are necessary for BrowserPod to function.
import { defineConfig } from "vite";
// https://vitejs.dev/config/export default defineConfig({  server: {    headers: {      "Cross-Origin-Embedder-Policy": "require-corp",      "Cross-Origin-Opener-Policy": "same-origin",    },  },});
index.html
This is the entry point of our application. It defines a basic HTML page with a few elements that we will use to set up BrowserPod.
<!doctype html><html lang="en"> <head> <meta charset="utf-8" /> <meta name="viewport" content="width=device-width, initial-scale=1.0" /> <title>Hello BrowserPod</title> <link rel="icon" type="image/png" href="/favicon.png" /> <link rel="stylesheet" href="/src/style.css" /> </head> <body> <div class="container"> <div class="header"> <img src="/logo.png" alt="BrowserPod Logo" class="logo" /> <h1>Hello BrowserPod</h1> </div> <p>Running Node.js in your browser</p> <div id="url">Waiting for portal...</div> <div class="preview-container"> <iframe id="portal"></iframe> <pre id="console"></pre> </div> </div> <script type="module" src="/src/main.js"></script> </body></html>src/utils.js
This file contains the utility function copyFile, that we will use in the main
script to copy files into the Pod.
export async function copyFile(pod, path) { const f = await pod.createFile("/" + path, "binary"); const resp = await fetch(path); const buf = await resp.arrayBuffer(); await f.write(buf); await f.close();}src/main.js
The main logic of our application. Here we create our Pod and run our express.js project in it.
import { BrowserPod } from "@leaningtech/browserpod";import { copyFile } from "./utils";
// Initialize the Podconst pod = await BrowserPod.boot({ apiKey: import.meta.env.VITE_BP_APIKEY });
// Create a Terminalconst terminal = await pod.createDefaultTerminal(  document.querySelector("#console"));
// Hook the portal to preview the web page in an iframeconst portalIframe = document.getElementById("portal");const urlDiv = document.getElementById("url");pod.onPortal(({ url, port }) => {  urlDiv.innerHTML = `Portal available at <a href="${url}">${url}</a> for local server listening on port ${port}`;  portalIframe.src = url;});
// Copy our project filesawait pod.createDirectory("/project");await copyFile(pod, "project/main.js");await copyFile(pod, "project/package.json");
// Install dependenciesawait pod.run("npm", ["install"], {  echo: true,  terminal: terminal,  cwd: "/project",});// Run the web serverawait pod.run("node", ["main.js"], {  echo: true,  terminal: terminal,  cwd: "/project",});
3. Run and setup your project
-
First, boot your Pod as usual and pass a valid API Key as an argument.
-
Then set up a terminal in the console element that was added to the
index.htmlfile, so that the output of the commands ran in the Pod are visible. -
Register a callback that will be notified every time an http server is started inside the Pod. The callback takes a Portal URL as an argument: a randomly generated, publicly accessible URL that you can use to show and interact with the inner project.
-
It will be shown that the page is up and running and link to it in the
#urldiv, and display a live rendering of it in the#portaliframe. Which were both set up in theindex.htmlpage. -
Then copy the project files inside the Pod, using the
copyFileutility function. -
Finally, run some commands inside the Pod:
npm installto install express.js and its dependencies, andnode main.jsto start the web server.
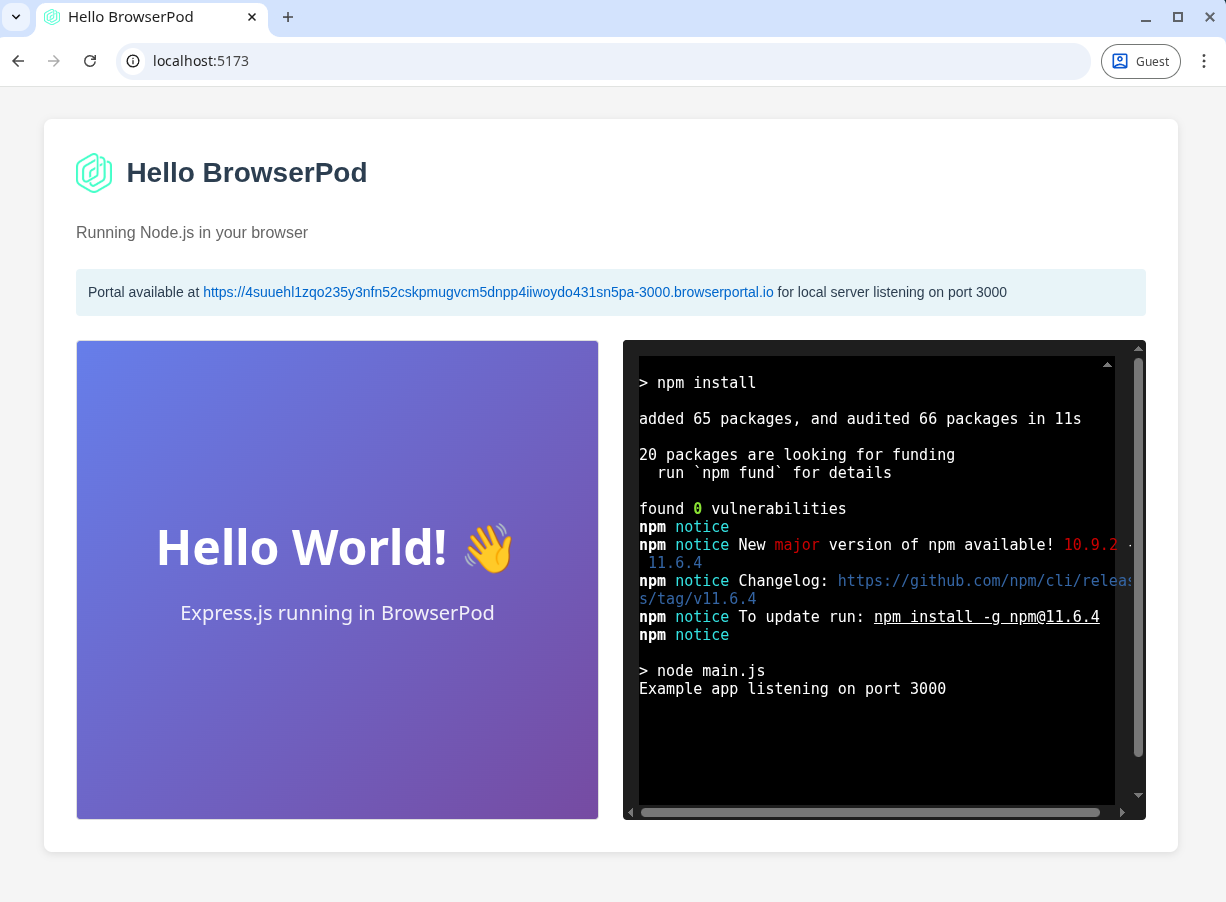
End result
Once the installation and setup are completed, you should see the iframe loading the main page of the project, served from inside the Pod via the Portal.